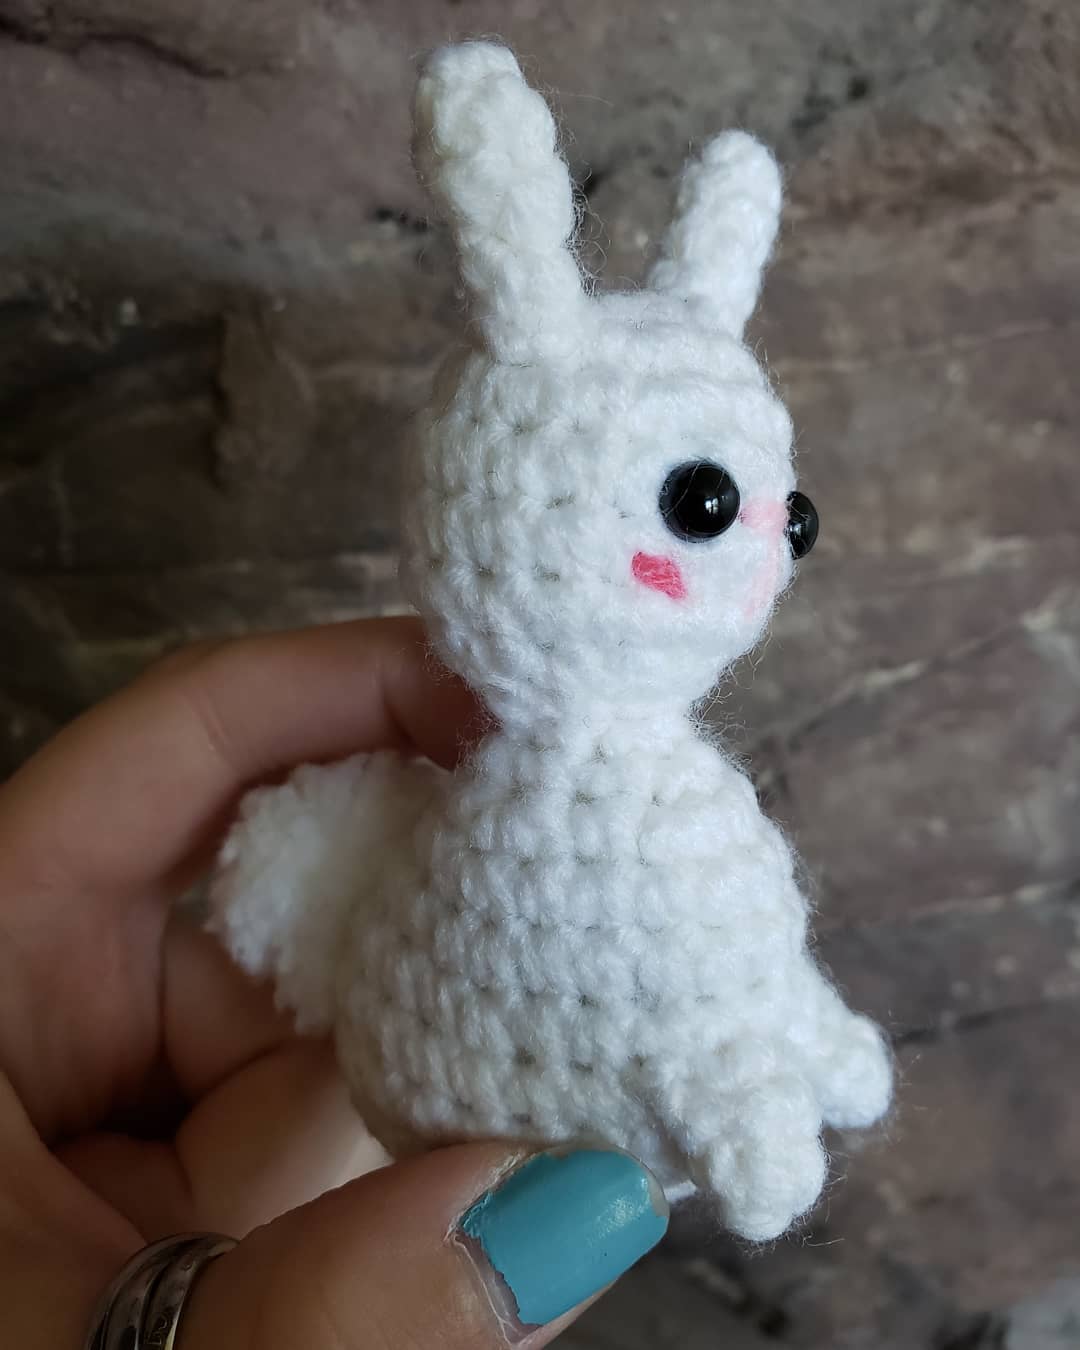


This little cutie was inspired by my Celebration of Easter set! This is the mini version of the bunny from this set! If you don’t know what I’m talking about go check that pattern out!
Do not sell, reproduce, or change the pattern itself in any way! You are welcome to sell your completed products, just make sure to refer to me as the designer! Please make sure to tag me
@crochetwizzard#crochetwizzard!
Materials-
- Worsted weight yarn
- White and some pink
- Hook size 3.5mm (E)
- 6mm Safety Eyes, or an alternative form of eyes
- Stitch Marker
- PolyFill
- Tapestry Needle
- Scissors
- Sewing Pins
US Abbreviations-
- Rd(s)- Round(s)
- MR- Magic Ring
- Sc- Single Crochet
- St(s)- Slip Stitch(s)
- Inc- Increase
- Dec- Invisible Decrease. In front loops only pick up the next two loops, yarn over and pull through twice.
- FO- Fasten Off
- FLO- Front Loop Only
Notes-
- Magic Ring Alternative- chain 2 and single crochet in the second chain from the hook.
- This will be crocheted in the round.
- If not specified or in () repeat to the end of the round.
- Stuff as you go.
Head and Body-
Rd 1: 6 MR
Rd 2: inc (12)
Rd 3: sc, inc (18)
Rds 4-6: sc around (18) (3 rounds)
Rd 7: sc, dec (12) insert the eyes between rds 5 and 6, 4 sts apart.
There are more pictures in the downloadable PDF version purchasable here!
Rd 8: dec (6)
Rd 9: sc around (6)
Rd 10: inc, sc 2, 2 inc, sc (9)
Rd 11: sc, inc, sc 2, inc x 3, sc, inc (14)
Rd 12: sc, inc, sc 2, inc, sc 2, inc x 3, sc 2, inc, sc (20)
Rd 13: sc 10, inc x 4, 6 sc (24)
Rds 14-16: sc around (24) (3 rounds)
Rd 17: sc, dec, sc (18)
Rd 18: sc, dec (12)
Rd 19: sc 2, dec 2, sc, dec 3 the last dec goes over the last st of the rd and the first st of the next.
FO and loop through the BLO to close. Close in a line lining up with the head and body.
There are more pictures in the downloadable PDF version purchasable here!
Ears- (make 2)
Rd 1: sc 4 in MR
Rds 2-4: sc around (3 rounds) (4)
Arms- (make 2)
Rd 1: sc 4 in MR
Rd 2: sc around (4)
Assembly-
Tail- make a pompom wrapping your yarn around a fork, with a long tail for sewing onto the back of the bunny. Attach between rd 14 and 15 on the back of the bunny and sew the gap on the back closed as pictured.
Ears- sew with the top between rds 1 and 2 and the bottom between rds 2 and 3.
Arms- sew arms between rds 14 and 15, 1 st apart.
Face- sew the nose between rds 5 and 6, between the eyes, and over 1 st 4 to 5 times. Go between the sts and go down 1 row. Make the cheeks as pictured.
There are more pictures in the downloadable PDF version purchasable here!
I would love to see your pictures! Please tag me in your pictures,
@crochetwizzard #crochetwizzard #beautifulbabybunny #crochetbunny #crochetbabybunny!
If you have any questions, please feel free to contact me! You can direct message me on Facebook or Instagram at @crochetwizzard or email me at crochetwizzardd@gmail.com.


