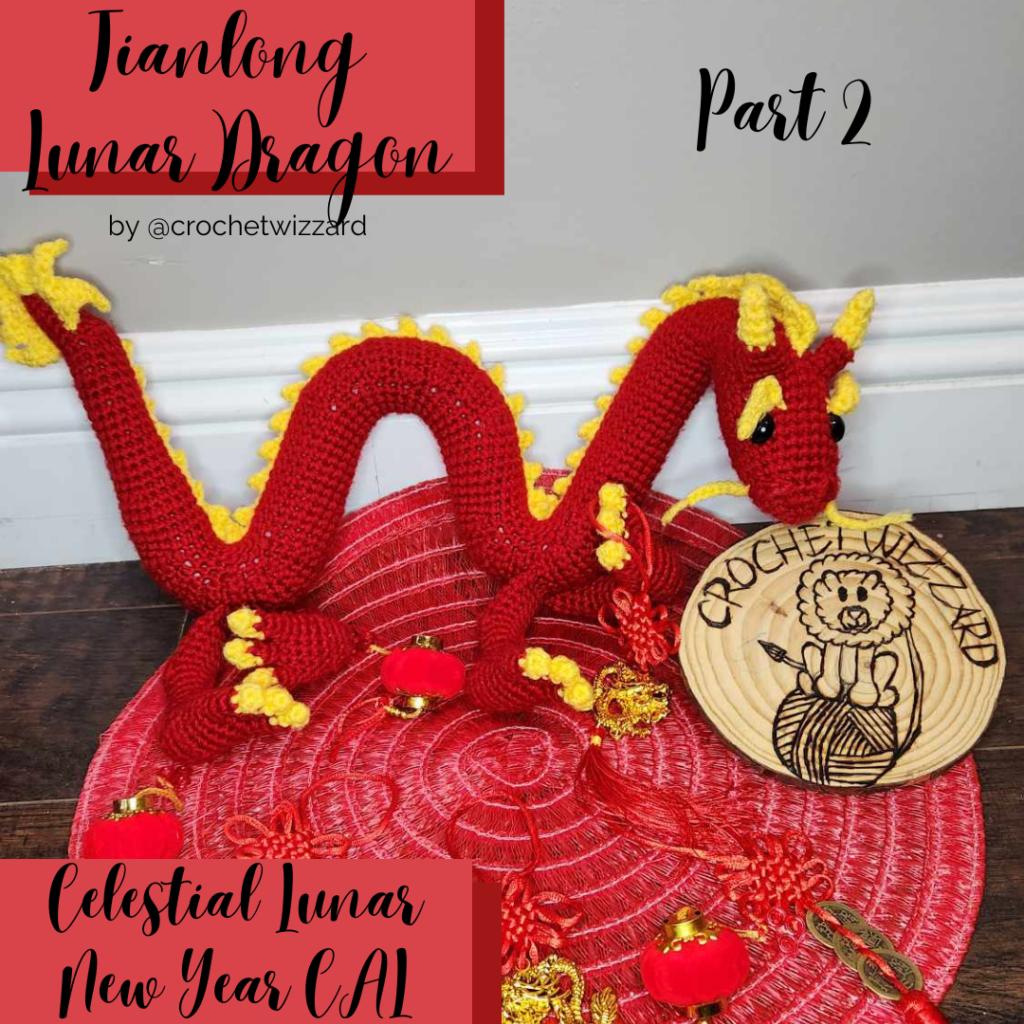
This little cutie is a Lunar New Year Dragon and is excited to celebrate with you. The name Tianlong means Celestial Dragon! This lovely dragon is certainly a majestic friend!
Hello friends and welcome to the Celestial Lunar New Year CAL! Let’s move on to Part 2! I hope you are excited to start working on Tianlong Lunar Dragon! He is such an amazing dragon! My son even said that he is perfect! Haha! He is 6 and I was so surprised that he said that! So needless to say this amigurumi dragon is perfect! My testers have really enjoyed working on the crochet dragon and love him! You are going to love the fact that there is no sewing involved in this perfect crochet dragon. I am so glad that we will all be able to work on this crochet dragon together in a crochet along! I hope you are excited for this Lunar New Year crochet along like I am!
With Part 2 of the Celestial Lunar New Year CAL we will be making the head, and down to the first curve. You have 3 days for this Part. This will be plenty of time to crochet the head and first curve of the dragon. If you have any questions please let me know!
Here is the schedule for each of the different parts of the Celestial Lunar New Year CAL:
Just as a heads up I won’t be including any pictures in the free CAL, but there are lots of wonderful pictures in the PDF version that you can purchase from one of my pattern shops. If you need more help please ask questions or purchase the pattern. There are some wonderful pictures in there that will be helpful to you. The pattern I believe is well written though.


Do not sell, reproduce, or change the pattern itself in any way! You are welcome to sell your completed products, just make sure to refer to me as the designer! Please make sure to tag me.
@crochetwizzard #crochetwizzard
Materials –
- Worsted weight yarn
- Red and Yellow
- Hook size 3.5mm (E)
- 14mm Safety Eyes, or an alternative form of eyes
- Stitch Marker
- PolyFill
- Tapestry Needle
- Scissors
- Sewing Pins
US Terminology –
Abbreviations –
- Rd(s) – Rounds(s)
- MR – Magic Ring
- St(s) – Stitch(s)
- Sst – Same Stitch
- The sts in the () are done in the same st
- Spst – Separate Stitches
- The sts in the () are done in separate sts
- Rs – Right Side
- Ws – Wrong Side
- Sr – Short Round
- Round that doesn’t go all the way around
- Ch – Chain
- Sl St – Slip Stitch
- Sss – Surface Slip Stitch
- Ssc – Surface Single Crochet
- Sk – Skip
- Pm – Place Stitch Marker
- This is the new start of the rd
- Sc – Single Crochet
- Hdc – Half Double Crochet
- Dc – Double Crochet
- Htc – Half Triple Crochet
- Tc – Triple Crochet
- Hqc – Half Quadruple Crochet
- Qc – Quadruple Crochet
- Bo – Bobble Stitch
- (yo, insert hook into st, pull up a loop, yo, pull through 2 loops on hook)sst x5, yo pull through all 6 loops on hook.
- Mp- Mini Picot
- Ch 2, sl st in the 2nd ch from the hook
- Inc – Increase
- Dec – Invisible Decrease
- In front loops only, pick up the next two loops, yarn over, and pull through 2 loops.
- FO – Fasten Off
- FLO – Front Loop Only – for closing up holes.
Notes –
- Magic Ring Alternative – chain 2 and single crochet in the second chain from the hook.
- This will be crocheted in the round.
- If not specified or in (), repeat to the end of the round.
- Stuff as you go.
- With all Short Rounds, make sure you turn without a ch so the working yarn is in the back.
The pattern has a downloadable PDF version purchasable here!
Head –
Red
Rd 1: sc 6 in MR
Rd 2: inc (12)
Rd 3: sc, inc (18)
Rd 4: sc 2, inc (24)
Rd 5: sc 3, inc (30)
Rd 6: sc 4, inc (36)
Rd 7: sk 18 sts (these will be worked in later), sc, pm, sc 17 (18)
Rd 8: sc 2, inc (24)
Rd 9-10: sc around (24) (2 rounds)
Rd 11: sc 12, this is where you will add the first horn, turn and don’t ch, insert your hook through the last st you made in the body through the wrong side, and the 1st st of the horn doing (sc 4)spst (these will not be worked again), sc 4 on the remaining sts of the horn (weaving your ends in as you sc), sc 6, turn and don’t ch, this is where you will add the 2nd horn, insert your hook through the last st you made in the body through the wrong side, and the 1st st of the horn doing (sc 4)spst (these will not be worked again), sc 4 on the remaining sts of the horn (weaving your end in as you sc), sc 6 (24 working sts, 32 total)
Rd 12: sc around leaving the 8 sts that are on the inside (24)
Rd 13: sc around (24)
Rd 14: sc 9, this is where you will add the left eyebrow, insert your hook through the 1st st of the eyebrow and the next available st on the body doing (sc 2)spst, sc 4 (weaving your ends in as you sc), this is where you will add the right eyebrow, insert your hook through the 1st st of the eyebrow and the next available st on the body doing (sc 2)spst (as you continue to crochet weave in ends), sc 7 (24)
Rd 15-18: sc around (24) (4 rounds)
Rd 19: sc 2, dec (18)
Rd 20: sc around (18)
Rd 21: sc 8, bo, sc 4, bo, sc 4 (18)
Rd 22: sc, dec (12)
Rd 23: dec (6)
FO, and weave in ends.
There are pictures in the downloadable PDF version purchasable here!
Nostrils –
Do one around each bo nostril after pushing it in
Red
There are pictures in the downloadable PDF version purchasable here!
Sss, ssc 3, sss around the bo from rd 21
FO, and weave in ends.
Whiskers –
Make 1 on the outside of each nostril
Yellow
There are pictures in the downloadable PDF version purchasable here!
Inserting the hook down sss between rds 19 and 20 a couple sts below the nostril, ch 8
FO, and trim.
Body –
Red
Rd 7: working in the 18 sk sts sc around (18)
Rd 8-25: sc around (18) (18 rounds)
Rd 26: sc 15, pm (15)
Rd 27: (rs) (sr) sc 9, turn, do not ch (9)
Rd 28: (ws) (sr) 9 sc, turn, do not ch (9)
Rd 29: sc around (18)
Rd 30: (rs) (sr) sc 10, turn, do not ch (10)
Rd 31: (ws) (sr) 9 sc, turn, do not ch (9)
Rd 32: sc around (18)
Rd 33-37: repeat rds 27-31 (5 rounds)
Rd 38: this is where you will add the 1st leg, insert your hook through the 1st st of the leg and the next available st on the body doing (sc 4)spst, (weaving your ends in as you sc), this is where you will add the 2nd leg, insert your hook through the 1st st of the leg and the next available st on the body doing (sc)spst (as you continue to crochet weave in ends), sc 10 (18)
Rd 39-44: repeat rds 27-32 (6 rounds)
Rd 45-50: repeat rds 27-29 x2 (6 rounds)
Thank you so much for working on Part 2 with me! We’ll be back on Thursday, Feb 8th for Part 3!
There are pictures in the downloadable PDF version purchasable here!
I would love to see your pictures! Please tag me in your pictures,
@crochetwizzard #crochetwizzard #tianlonglunardragon #crochetlunardragon #crochetdragon!
If you have any questions, please feel free to contact me! You can direct message me on Facebook or Instagram at @crochetwizzard or email me at amidesigns@crochetwizzard.com.