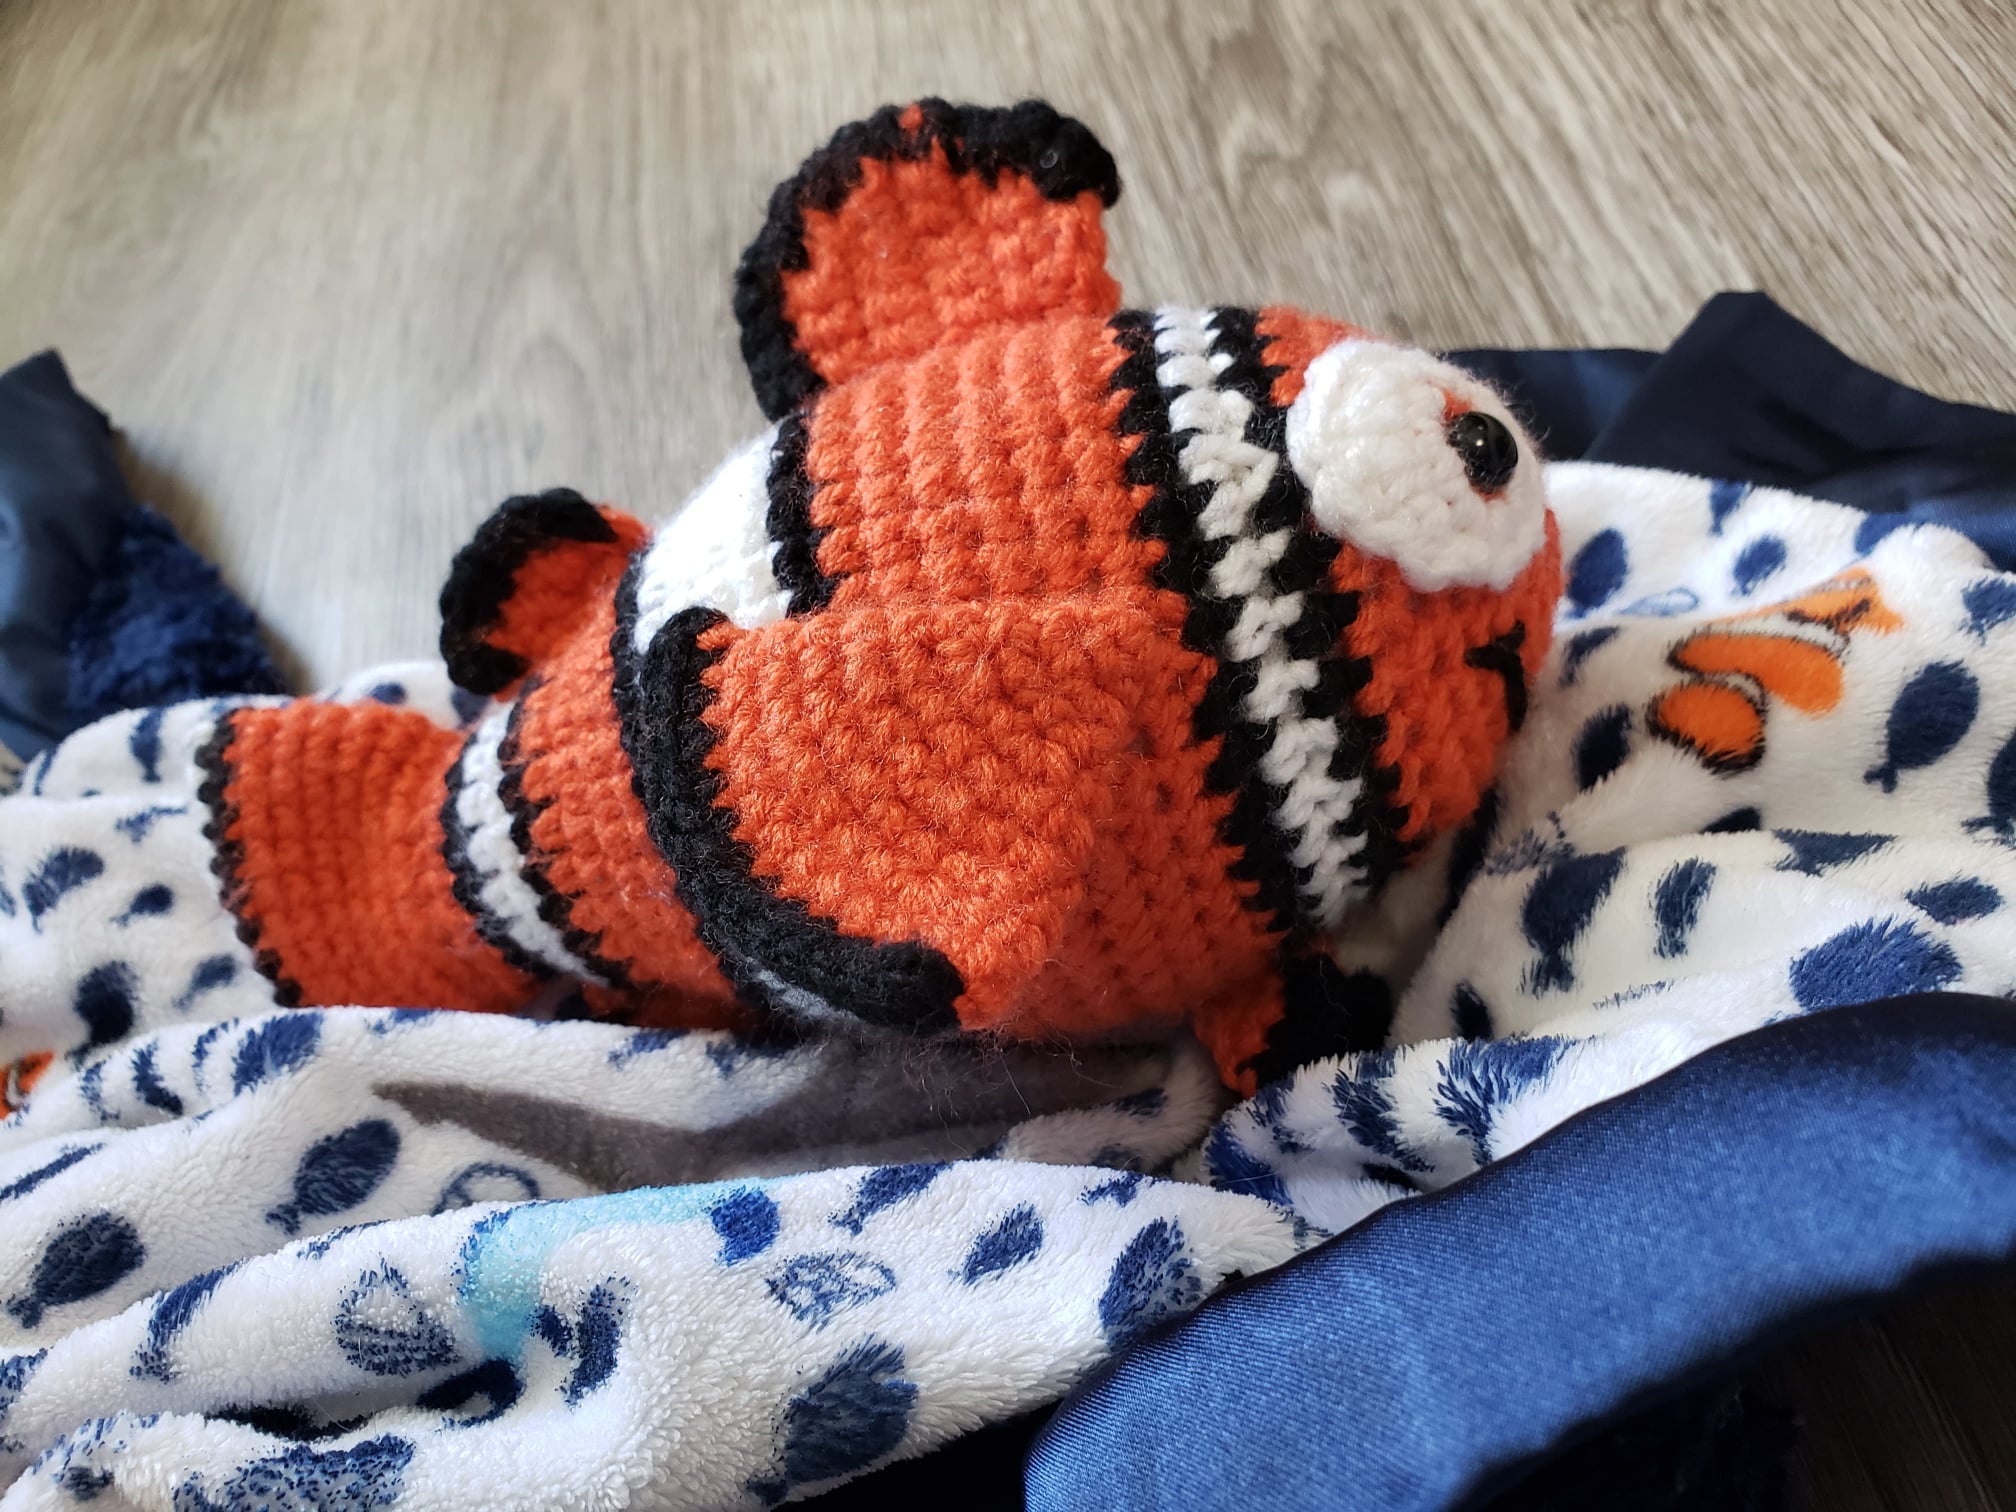


My son loves the movie, Finding Nemo!! I of course had to make a clownfish for him! He loves it and now wants a Dory! Haha! I guess we shall see! I love him and I hope you love him too!
Do not sell, reproduce, or change the pattern itself in any way! You are welcome to sell your completed products, just make sure to refer to me as the designer! Please make sure to tag me
@crochetwizzard #crochetwizzard!
Materials-
- Worsted weight yarn
- Orange, white, and black
- Hook size 3.5mm (E)
- 10mm Safety Eyes, or an alternative form of eyes
- Stitch Marker
- PolyFill
- Tapestry Needle
- Scissors
- Sewing Pins
US Abbreviations-
- Rd(s)- Round(s)
- MR- Magic Ring
- Sc- Single Crochet
- St(s)- Stitch(s)
- Inc- Increase
- Dec- Invisible Decrease (on the top and bottom fins use a normal dec)
- In front loops only, pick up the next two loops, yarn over and pull through twice.
- FO- Fasten Off
- FLO- Front Loop Only
Notes-
- Magic Ring Alternative- chain 2 and single crochet in the second chain from the hook.
- This will be crocheted in the round.
- If not specified or in () repeat to the end of the round.
- Stuff as you go.
Eyes (make 2)
Orange
Rd 1: sc 8 in MR
Change to white
Rd 2: inc (16)
Rd 3: this is a partial rd. Sc, 2 hdc, dc, (dc, hdc), hdc, sc (8)
FO leaving a tail to sew.
Tail-
Orange
Rd 1: sc 6 in MR
Rd 2: inc (12)
Rd 3: sc, inc (18)
Rd 4: sc 2, inc (24)
Rds 5-9: sc around (24) (5 rounds)
Change to black
Rd 10: sc around (24)
Change to white
Rd 11: ch 1, fold in half, sc through both sides (12 )
For the first sc make sure to go through the next st and the sc you just crocheted. Make sure the white goes from edge to edge. (12)
FO and sew in the ends.
Body-
Orange
Take the tail fin you just finished and point it down with the white at the bottom. For the first rd of the body, you will be crocheting around the posts of rd 3. The posts are above the v’s of rd 3. Start rd 1 on a side of your choice of the folded tail. The rd count is starting over for the body.
There are more pictures in the downloadable PDF version purchasable here!
Rds 1-2: sc around (18) (2 rounds)
Change to black
Rd 3: sc around (18)
Change to white
Rd 4: sc around (18)
Rd 5: sc 2, inc (24)
Change to black
Rd 6: sc around (24)
Change to Orange
Rd 7: sc around (24)
Rd 8: sc 3, inc (30)
Rds 9-10: sc around (30) (2 rounds)
Change to black
Rd 11: sc 4, inc (36)
Change to white
Rds 12-13: sc around (36) (2 rounds)
Rd 14: sc 5, inc (42)
Rd 15: sc around (42)
Change to black
Rd 16: sc around (42)
Change to orange
Rd 17: sc 6, inc (48)
Rds 18-20: sc around (48) (3 rounds)
Rd 21: sc 6, dec (42)
Rd 22: sc around (42)
Change to black
Rd 23: sc 5, dec (36)
Change to white
Rd 24: sc around (36)
Change to black
Rd 25: sc 4, dec (30)
Change to orange
Rd 26: sc around (30)
Rd 27: sc 3, dec (24)
Rd 28: sc around (24)
Rd 29: sc 2, dec (18)
Rd 30: sc around (18)
Rd 31: sc, dec (12)
Rd 32: sc around (12) place the safety eyes through the colored crocheted eyepieces between rds 27 and 28 equally on either side of the center above the center. When you sew the white part of the eyes to the fish, add a little bit of stuffing. The edge of the eyes should touch the inside black of the first stripe.
See picture in assembly.
There are more pictures in the downloadable PDF version purchasable here!
Rd 33: dec (6)
FO and sew in ends.
Side Fins (make 2)
Orange
There are more pictures in the downloadable PDF version purchasable here!
Rd 1: sc 5 in MR. Leaving a long tail for sewing from the MR let the tail dangle outside the fin.
Rd 2: sc around (5)
Rd 3: inc (10)
Rd 4: sc around (10)
Rd 5: sc, inc (15)
Rd 6: sc around (15)
Rd 7: sc 2, inc (20)
Rd 8: sc around (20)
Rd 9: sc 3, inc (25)
Rd 10: sc around (25)
Change to black
Rd 11: fold in half, ch 1, sc across through both sts. For the first sc make sure to go through the next st and the sc you just crocheted. This will make sure the black goes from edge to edge. (13)
FO and sew in ends.
Big Top Fin-
Orange
There are more pictures in the downloadable PDF version purchasable here!
Ch 4
Rd 1: sc in the second ch from the hook, sc 3, ch 1, and turn (3)
Rd 2: sc 4 (including the ch 1 space) ch 1, and turn (4)
Rd 3: sc 3, inc, ch 1, and turn (5)
Rd 4: inc, sc 4, ch 1, and turn (6)
Rds 5-7: sc across, ch 1 and turn (6) (3 rounds)
Rd 8: dec, sc 4, ch 1, and turn (5)
Rd 9: sc 3, dec, ch 1, and turn (4) FO the orange, leave a tail for sewing.
Change to black
You are going to crochet on 2 sides of the fin. Sc 4 like a normal row but put 2 sc in the last st to go around the corner, sc across the rounded long side, I did 10 but sc enough to get across, sc 2 in the last st and FO.
Medium Top and Bottom Fin (make 2)
Orange
There are more pictures in the downloadable PDF version purchasable here!
Ch 3
Rd 1: sc in the second ch from the hook, sc 2, ch 1 and turn (2)
Rd 2: sc 3 (including the ch 1 space) ch 1 and turn (3)
Rd 3: sc 2, inc, ch 1 and turn (4)
Rd 4: dec, sc 2, ch 1 and turn (3)
Rd 5: sc across (3). When you FO the orange, leave a tail for sewing.
Change to black
Rd 6: 6 sc across the long rounded side with 2 sc in the corner or as many as you need.
FO and sew in the ends.
Small Bottom Fin (make 2)
Orange
There are more pictures in the downloadable PDF version purchasable here!
Ch 2
Rd 1: sc in the second ch from the hook, ch 1, and turn (1)
Rd 2: sc 2 (including the ch 1 space) ch 1 and turn (2)
Rd 3: sc, inc, ch 1 and turn (3). FO leave a tail for sewing
Change to black
Rd 4: sc 2, inc (4)
FO and sew in the ends.
Assembly-
There are more pictures in the downloadable PDF version purchasable here!
The 2 side fins go on either side of the fish 1 orange rd behind the black of the first strip. You will want to sew just the tip of the triangle so the fin can move.
The large top fin will be sewn to the top center, start sewing touching the black of the first stripe.
The 2 small fins will be sewn together on the bottom, centered 2 rds behind the black of the first stripe.
The 2 medium fins one on the top and one on the bottom start right behind the black of the second stripe and back. The end of the fin that has a little black along the short side is at the back of the fish.
The smile will be along the fifth rd from the center of the face.
There are more pictures in the downloadable PDF version purchasable here!
I would love to see your pictures! Please tag me in your pictures,
@crochetwizzard #crochetwizzard #clarenceclownfish #crochetclownfish #crochetfish!
If you have any questions, please feel free to contact me! You can direct message me on Facebook or Instagram at @crochetwizzard or email me at crochetwizzardd@gmail.com.


