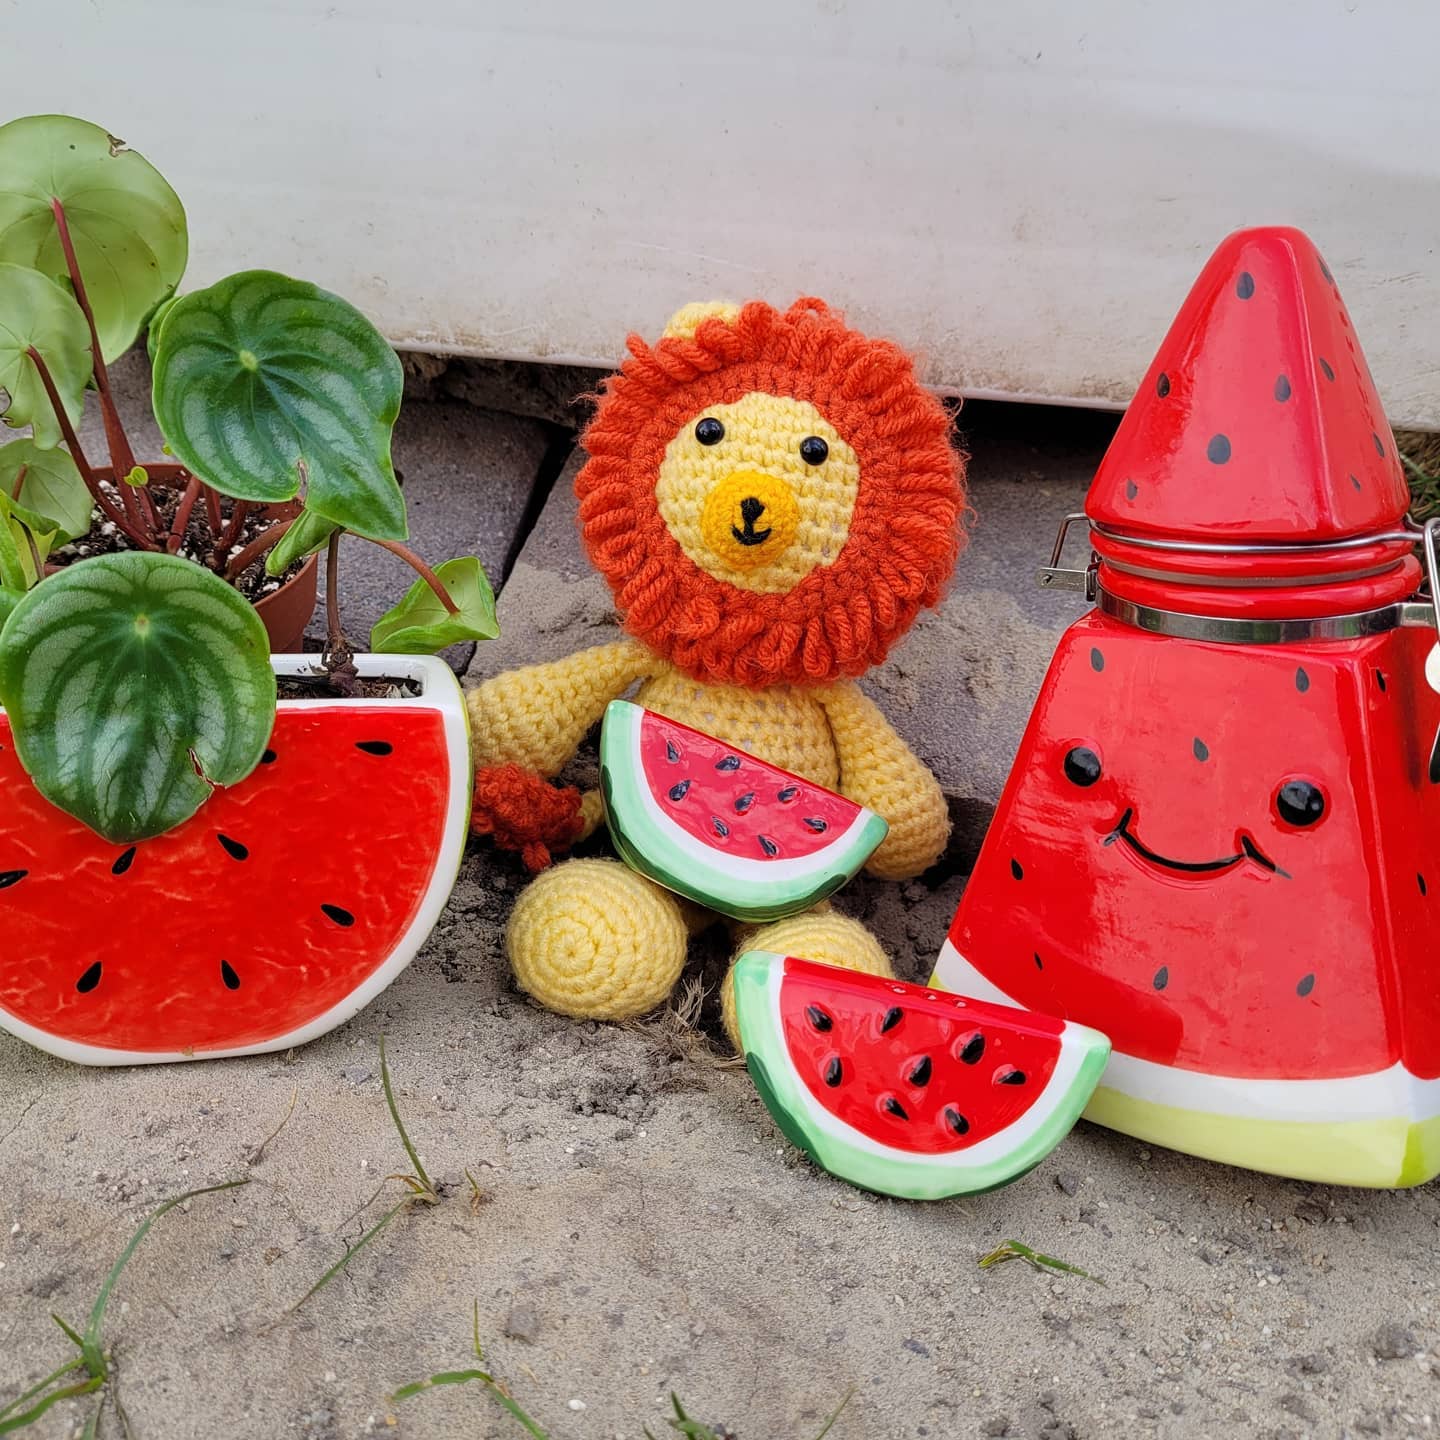


I designed my logo with a lion on a yarn ball. I was talking with a designer friend and we decided to make our logos and this little king was born! I love him a lot and am finally after over a year publishing this pattern!!


Do not sell, reproduce, or change the pattern itself in any way! You are welcome to sell your completed products, just make sure to refer to me as the designer! Please make sure to tag me
@crochetwizzard #crochetwizzard!
Materials-
- Worsted weight yarn
- Light and dark yellow, orange, and black
- Hook size 3.5mm (E)
- 10mm Safety Eyes, or an alternative form of eyes
- Stitch Marker
- PolyFill
- Tapestry Needle
- Scissors
- Sewing Pins
US Abbreviations-
- Rd(s)- Round(s)
- MR- Magic Ring
- Sc- Single Crochet
- SlSt(s)- Slip Stitch(s)
- Inc- Increase
- Dec- Invisible Decrease
- In front loops only pick up the next two loops, yarn over, and pull through twice.
- Lp- Loop Stitch
- You will be making the loops on the wrong side. Insert hook, create a loop by pinching working yarn together (making a ¾ inch loop for mane and 1 cm for tail). Move hook behind the loop and use the loop as your yarn over, pull through, insert hook, yarn over to finish the sc as normal.
- After the loops have been pulled through the finished loops will be ½ inch for the mane and ¾ cm for the tail.
- FO- Fasten Off
- FLO- Front Loop Only
For a photo tutorial purchase the PDF version from
Or
Notes-
- Magic Ring Alternative- chain 2 and single crochet in the second chain from the hook.
- This will be crocheted in the round.
- If not specified or in () repeat to the end of the round.
- Stuff as you go.
Head-
Yellow
Rd 1- sc 6 in MR
Rd 2: inc (12)
Rd 3: sc, inc (18)
Rd 4: sc 2, inc (24)
Rd 5: sc 3, inc (30)
Rd 6: sc 4, inc (36)
Rd 7-13: sc around (36) (7 rounds)
Rd 14: sc 4, dec (30)
Rd 15: sc 3, dec (24) insert eyes between rds 8 and 9, about 5 sts apart.
Rd 16: sc 2, dec (18) Stuff
Rd 17: sc, dec (12)
Rd 18: dec (6)
FO and weave in end.
Adjust how many rds you inc and how long the mane cap is according to how much you stuff the head. This is how I made mine. There are fewer inc rds than the head because the lp is thicker than a normal sc, at least how I do the lp.
Mane Cap-
Orange
There are more pictures in the downloadable PDF version purchasable here!
Rd 1: lp 6 in MR
Rd 2: lp inc (12)
Rd 3: lp, lp inc (18)
Rd 4: 2 lp, lp inc (24)
Rd 5: 3 lp, lp inc (30)
Rd 6-14: lp around (30) (9 rounds)
FO and leave a long tail for sewing. Sew to the head.
Muzzle-
Dark Yellow
There are more pictures in the downloadable PDF version purchasable here!
Rd 1: sc 6 in MR
Rd 2: inc (12)
FO and leave a tail for sewing.
Sew a nose and mouth as pictured.
Sew to the face starting 1 rd above the mane, going up 4 rds to the top. Stuff as you sew closed.
Ears (make 2)
Light Yellow
Rd 1: sc 6 in MR
Rd 2: inc (12)
Rd 3-4: sc around (12) (2 rounds)
FO and leave a tail for sewing. Sew behind the second rd of the mane about 2 sts apart, see picture for aid.
There are more pictures in the downloadable PDF version purchasable here!
Body-
Light Yellow
Rd 1- sc 6 in MR
Rd 2: inc (12)
Rd 3: sc, inc (18)
Rd 4: sc 2, inc (24)
Rd 5: sc 3, inc (30)
Rd 6: sc 4, inc (36)
Rd 7-11: sc around (36) (5 rounds)
Rd 12: sc 4, dec (30)
Rd 13: sc around (30)
Rd 14: sc 3, dec (24)
Rd 15: sc around (24)
Rd 16: sc 2, dec (18)
Rd 17: sc around (18)
Rd 18: sc, dec (12) Stuff
FO leaving a long tail for sewing the head on.
Sew head to the top of the body.
Arms (make 2)
Light Yellow
Rd 1: sc 6 in MR
Rd 2: inc (12)
Rd 3: sc, inc (18)
Rd 4-6: sc around (18) (3 rounds)
Rd 7: sc, dec (12)
Rd 8: sc 2, dec (9)
Rd 9-14: sc around (9) (6 rounds) Stuff loosely ¾ of the way.
Rd 15: fold in half by pinching closed and sc through both sc to close.
FO leaving a tail for sewing. Sew between rds 16 and 17.
Legs (make 2)
Light Yellow
Rd 1: sc 6 in MR
Rd 2: inc (12)
Rd 3: sc, inc (18)
Rd 4: (sc 3, inc)x 4, sc 2 (22)
Rd 5-8: sc around (22) (4 rounds)
Rd 9: (sc 3, dec)x 4, sc 2 (18)
Rd 10: sc, dec (12)
Rd 11-19: sc around (12) (9 rounds) Stuff loosely ¾ of the way.
Rd 20: fold in half by pinching closed and sc through both sc to close.
FO leaving a tail for sewing. Sew the legs starting at the center and going out along the center of the bottom of the body.
Tail-
Orange
With lp
There are more pictures in the downloadable PDF version purchasable here!
Rd 1: lp 4 in MR
Rd 2: lp, lp inc (6)
Rd 3: lp around (6)
Rd 4: lp, lp inc (9)
Rd 5: lp around (9)
Rd 6: lp, lp dec (6)
Sl st and fasten off.
Change to light yellow. Attach and sc like normal keeping the loops on the outside. Insert the hook through the orange tail tip from wrong to right side, loops on the outside to inside, and continue to sc around.
Rd 7: sc 4, dec (5) Stuff the orange tip.
Rd 8-19: sc around (5) (12 rounds)
FO leaving a tail for sewing.
Sew to the body with the bottom between rds 5 and 6 and the top between rds 7 and 8.
A different option for the tail-
Orange
With sc
Rd 1: sc 4 in MR
Rd 2: sc, sc inc (6)
Rd 3: sc around (6)
Rd 4: sc, sc inc (9)
Rd 5: sc around (9)
Rd 6: sc, sc dec (6)
Change to light yellow
Rd 7: sc 4, dec (5) Stuff the orange tip.
Rd 8-19: sc around (5) (12 rounds)
FO leaving a tail for sewing.
Sew to the body at the bottom between rds 5 and 6 and at the top between rds 7 and 8.
I would love to see your pictures! Please tag me in your pictures,
@crochetwizzard #crochetwizzard #leolion #crochetlion!
If you have any questions, please feel free to contact me! You can direct message me on Facebook or Instagram at @crochetwizzard or email me at crochetwizzardd@gmail.com.